Knife Polishing and Surface Finishing: Processes, Abrasives and Consistency
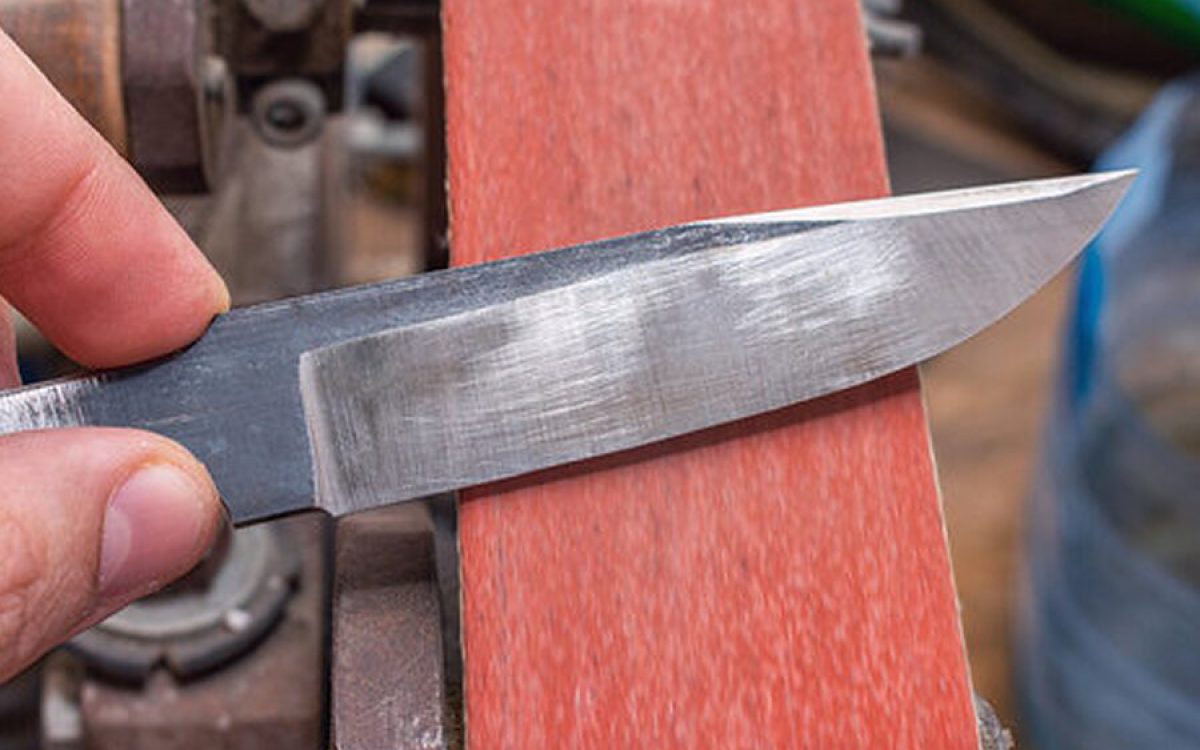
Polishing is where a knife starts to look expensive. It is also one of the two most labour-intensive operations in a cutlery factory and the first to be reduced when a quotation needs to come down. Understanding the process lets a buyer specify a finish that can actually be held in production.
This article covers the polishing sequence, the equipment, the abrasives and how to specify a finish that survives a bulk run.
The polishing sequence
| Stage | Purpose | Typical media | Result | Issue if skipped |
|---|---|---|---|---|
| Coarse grinding | Remove grinding marks from the previous operation | Coarse belt, 36–80 grit equivalent | Uniform coarse surface | Deep marks remain visible under polish, and a mirror finish cannot be achieved |
| Medium grinding | Reduce the scratch depth | 120–240 grit | Finer, still visible lines | Time wasted in later stages removing coarse scratches |
| Fine grinding | Establish the base surface for polishing | 320–600 grit | Satin appearance | Polishing takes much longer and heat rises |
| Pre-polish | Begin to remove the fine lines | Buff with a medium compound | Semi-gloss | Inconsistent gloss across a batch |
| Polish | Remove the fine lines | Buff with a fine compound | Gloss, near mirror | — |
| Colour polish / final buff | Remove the last haze | Soft buff with a very fine compound | Mirror, or a uniform satin if that is the target | Slight haze, visible on close inspection |
| Cleaning and degreasing | Remove compound residue | Solvent or alkaline wash | Clean surface | Residue left in the pack; a food contact and appearance problem |
The rule that governs the whole sequence: each stage must fully remove the marks of the previous stage. Skipping a stage does not save time, it moves the work to a later stage where it is slower and generates more heat. This is why a factory under cost pressure produces a surface with fine underlying scratches visible under angled light.
Equipment and abrasives
| Equipment | What it is used for | Consistency | Labour intensity |
|---|---|---|---|
| Belt grinder | Grinding and satin finishes | Good with consistent pressure | Moderate |
| Polishing lathe with cloth buffs | Polished and mirror finishes | Operator-dependent | High |
| Multi-head automatic polisher | Volume polishing, multiple stages in sequence | Good | Low per piece |
| Robotic polishing cell | Consistent force and path | Very good after programming | Very low per piece |
| Vibratory tumbling | Edge breaking, deburring, some surface preparation | Even by nature | Very low |
| Bead blasting cabinet | Matte finishes | Good if media and pressure are controlled | Moderate |
| Electropolishing bath | Removing surface peaks without mechanical contact | Very good | Low, but capital and chemistry |
Abrasive and compound selection
| Type | Typical use | Characteristic |
|---|---|---|
| Aluminium oxide | Grinding belts and some compounds | General purpose, durable |
| Silicon carbide | Grinding and finishing, hard materials | Sharp and aggressive; good on stainless |
| Zirconia alumina | Coarse grinding belts | Long life at high pressure |
| Ceramic abrasive | High-performance grinding | Long life, cool cutting |
| Diamond | Fine finishing, hard steels | Expensive, very long life |
| Aluminium oxide compound (white) | Pre-polish and polish of stainless | The standard for cutlery polishing |
| Chromium oxide compound (green) | Final polish on stainless and hard steels | Produces a bright finish |
| Diamond compound | Hard steels, mirror finishing | Effective on high-vanadium grades |
| Emery compound | Coarser polishing | Fast cutting, leaves a coarser surface |
Heat during polishing
Polishing generates heat through friction, and like grinding it can affect a thin edge. The risk is lower than in grinding because material removal is small, but it is not zero, particularly on buffers run at high speed with heavy pressure and a dry surface.
- Buffing compound provides some lubrication and cooling; a dry buff generates more heat.
- Light pressure with a fine compound is both better for the surface and safer for the edge.
- Polishing near the edge should be avoided on thin sections; the edge is best left to the sharpening stage.
- On a premium blade, verify hardness after finishing, not only after heat treatment.
Finish consistency — the real problem
| Source of inconsistency | What it looks like | Control |
|---|---|---|
| Operator pressure variation | Some pieces glossier, some duller | Jigs, light pressure standards, training |
| Buff wear across a run | Progressive dulling from the start to the end of a shift | Buff change schedule, not on condition |
| Compound depletion | Inconsistent cutting rate | Compound reapplication interval |
| Blade distortion | High spots polish through to a different sheen | Straightness control after heat treatment |
| Direction changes | A brushed finish with crossing directions | Fixed direction per surface, stated on the drawing |
| Blasting media degradation | Blast finish getting coarser or finer over time | Media change schedule and pressure monitoring |
Finish consistency is what buyers notice without being able to explain. Two knives from the same carton that differ in sheen read as a quality failure to a retail buyer, even if both are within any dimensional tolerance. The practical control is a retained golden sample, a light source standard, and an inspection rule that compares against the sample rather than against a description.
Specifying a finish that can be held
| Finish wanted | Specify this | Do not specify this |
|---|---|---|
| Satin | Belt grit stage, direction of the lines, and a golden sample | "Brushed" alone |
| Mirror | Full sequence to final colour polish, plus an inspection rule against the sample | "High polish" |
| Bead blast | Media type, size, blasting pressure, coverage | "Matte" or "sandblasted" |
| Hand-rubbed satin | Direction, line length, whether the lines run full length, and a sample | "Hand finished" |
| Stone wash | Media, tumbling time, and the resulting appearance reference | "Vintage look" |
| Two-tone, blasted blade and polished spine | Which surfaces get which treatment, with a drawing | A description in prose |
For any finish above a fine satin, supply a physical sample or approve the first-article finish and retain it. A photograph cannot carry finish information reliably because lighting changes everything. See surface finishes.
Finishing and marking order
A common and expensive mistake is marking the blade before a final polish, or polishing after marking and erasing the mark. The correct sequence is decided by the mark depth:
| Mark type | Correct sequence |
|---|---|
| Laser annealing mark, shallow | Polish first, mark last |
| Laser engraving, deeper | Polish, mark, then a light clean only |
| Chemical etch | Polish, etch, rinse, then no abrasive contact |
| Stamped or embossed | Stamp during forming, then polish around it carefully |
| Pad print | All surface work complete, then print |
Writing this into the process instruction prevents a batch where half the marks are faint because the polishing operator removed them. See logo marking.
Cost and where the money is
| Finish | Number of operations | Labour intensity | Rejection sensitivity | Cost index |
|---|---|---|---|---|
| Coarse satin | 1–2 | Low | Low | 100 |
| Fine satin | 2–3 | Low to moderate | Low | 120 |
| Bead blast | 1 plus masking if partial | Moderate | Moderate | 135 |
| Stone wash | 1 plus tumbling time | Low | Low | 130 |
| Mirror, machine | 5–7 | High | High — every scratch shows | 210 |
| Hand-rubbed satin | 3–5 with hand work | Very high | High — line consistency is visible | 270 |
| Two-tone with masking | Multiple plus masking steps | Very high | Very high | 300 |
Rejection sensitivity is the hidden cost. A mirror finish shows every handling mark, so the rejection rate is higher and the packing requirement is stricter. When a factory quotes a mirror finish at a modest premium, ask what their rejection rate is and whether the pack includes an edge guard and a protective film. A cheap mirror quote plus a poor pack produces scratched blades on arrival.
Practical specification checklist
- Name the finish by process and grit sequence, not by adjective.
- State the direction of the lines for any line finish.
- State which surfaces receive which finish, with a drawing for two-tone work.
- Approve a first-article finish and retain it as the golden sample.
- Define the inspection lighting condition.
- Define the marking and finishing order in the process instruction.
- Specify the pack protection appropriate to the finish, including an edge guard and any protective film.
- For mirror finishes, agree the acceptable defect size and count in the inspection standard.
Related reading
Looking for a kitchen knife manufacturer?
We manufacture chef knives, knife sets, Damascus and steak knives in Yangjiang with OEM and private label service. Get a quote today.
Get Free Quote → Browse Products